Sunday Best

OOTD

nautical outfit

Hey guys!!

So as you all probably know by now, I love clothes! I love making them and I love buying them. I especially love making them because as much as I love buying clothes, my finances aren’t really set up for such wild behavior. However I recently found this crop top for $10 and I’m sure we’re going to have a beautiful relationship 🙂 .

striped crop top

I never do ootd’s on here but I was feeling extra fly on this day, the weather was banging, we were walking and my brother was inspired hence photoshoot!stripes and peach

dabbing
Dab game on fleek doe

Initially wore heels with this outfit but I quickly switched those out for flats…a decision I was very satisfied with.

crop top and pencil skirt


abstract dabbing

Pictures by Willyverse

Summering

Halter Summer Dress

gathered summer dress

Hi Guys!!!

So if you guessed this would be my next post you was right! (go ahead you can pat yourself on the back)

I made this super simple dress at the start of summer and it fast became a wardrobe fave for me. For difficulty, I would rate this a 5/10 mainly because of the braided strap but even at that, this was a pretty basic project.Vingt-Un Enang

I started off with a large rectangular piece for the front and two smaller rectangles for the back. I hemmed the bottom edge and sewed down a one inch loop on the top edge. With all raw edges hemmed, I attached the front piece to the back pieces and stopped 8 inches short of the top for arm holes and so I would be able to get into the dress.

back of summer dress

The next step was making the strap. I made two thin strips, tied them up on one end and twisted all the way down. I say this now and it sounds pretty easy but turning the strips inside out was a lot harder than I though it would be. After about 30 minutes of struggling I finally finished and put the strap through my one inch loop and gathered my dress till I was comfortable with the fit and look.

braided straps

Finally I sewed down the ends of the gathered points so it wouldn’t move around and ta da!!

mini dress for warm weather

I wonder if there is a way to transition this dress into the colder months. Do you guys have any pieces that you wear no matter the season? Also I might have a post coming up on these scrunchies in my hair 🙂

Pictures by Willyverse

Still just a baby

Thoughts on turning 21

Vingt-Un Enang

So its my birthday!!! I’ve made my goals for this new year of my life and I’m generally happy with where I am right now. At twenty I really just wanted to push myself and explore more which I feel I did. At twenty-one, I am realizing to a different degree that my possibilities are endless but I won’t get anywhere without trying. I am realizing that there is a lot that I still don’t know and plenty that I have to learn. I’m not as scared of responsibility as I was a year ago but I’m happy to have the support systems that I do. I am acknowledging my weaknesses and building my strengths.

I am excited for the year ahead and hopefully a year from now when I look at myself I would be a significantly better person than I am today.

ps I dropped a hint for my next post just in case you didn’t notice :p

Picture by Willyverse

Violets are blue…

Making a Matching Shorts and Crop Set

matching set- ibegan

Its been ages, just ages since I’ve posted anything! Not that I haven’t written anything, I have a few drafts that can testify to my being here but I wanted my first post after my hiatus to be so clutch you would feel it was sooo worth the wait. Now with this outfit I don’t think I could have been anymore clutch. Not to toot my own horn but *toot toot*.

DSCF3536

This baby was a real piece of work!! I completed the entire outfit in three days spanned over a week. I did the shorts first and while they weren’t easy they weren’t the hardest part of this look. Making this top was one of the most frustrating sewing experiences I’ve had in a while, mainly because it always looked perfect before I put it on. After attempting to adjust it and failing horribly, I just took it apart and started over. The great thing about difficult projects though is how amazing you feel when you finally get it right.

Powder blue 2 piece Enang Ukoh

Overall I would rate the difficulty of this project an 8.5/10. It could be easier for someone with a lot more skill but I wouldn’t recommend this for a beginner project. The entire outfit was based on Withwendy tutorials. If you’re just getting into sewing definitely check her channel out on YouTube. I was particularly pleased with how the split back turned out because I’ve never tried anything like this before.

split back top Enang Ukoh- Ibegan

Oh and check me out adding pockets and cuffs and zippers and sleeves like I own the place :D. I feel like I really applied many of the skills I’ve gathered over the past year and a half/ two years.

split-back top-begin

With Spring hanging in there are Summer being just a heartbeat away I felt this would be the perfect two-piece. I can split them up for very different looks and I’m perfectly content wearing them together. Basically I’m very thrilled. Speaking of being thrilled, I have officially completed my undergrad!!!! I have a post coming up about my favorite memories from my last year but yea, your girl can finally breathe a little and just live! 🙂

summer outfit- Enang-Begin

pictures by: Willyverse

Fro’ Tales: Blog feature

Hey y’all!

I have been under a rock for a minute and that’s going to change at the end of the month when school ends but I thought I’d share some pretty dopesome news.

I was feature on a hair blog!!! 😀 (I know eh! little ol’ me). Karina has an amazing natural hair blog and you should all check it out ^_^

Processed with VSCOcam with c1 presethttp://www.shesgotnigeriancurls.com/post/116460937181/shesgotnigeriancurls-fro-feature-enang-of

‘Fro Tales: Curl parfait

Edible Conditioning 2

Girrrrrllll! Let me tell you! I’m officially in love with Greek yogurt

First of all, shout out to heramerpersandhim for suggesting this to me in my last post. She said; “I stopped using banana because it was too hard to rinse out. Even when I used the baby formula. I switched to full fat Greek yogurt and never looked back.” For this you the real MVP. I absolutely loved it.

I never thought I’d become a “Kitchen Natural” as I like to call them, so as I went to the grocery store to grab a small tub of Greek yogurt I was saying a silent prayer that it would work or I would have been very upset with myself. With no exact measurements, I mixed Greek yogurt, honey, coconut oil and a few drops of Argan oil. The first thing that stood out to me was that the consistency was smooth unlike my lumpy bumpy banana mix. Processed with VSCOcam with a5 preset

I started off with a week old twist out that was more than a little dry. I left the conditioner in for about 30 minutes and rinsed with hot water. Everything rinsed right out! I wasn’t too confident until I could see my hair for myself though. I partly imagined my hair looking dull for some reason. Anyhow I came out of the shower and BAM!  Soft shiny hair. Now I was really excited. Detangling was a breeze and I braided my hair into two cornrows as usual.Processed with VSCOcam with g3 preset

Normally I would have to do a twist out on my damp hair when I take the cornrows down to get a really delicious fro, but not this time. Instant gorgeousness the minute I let the braids loose. I just had to fluff and move it around to frame my face better.

Processed with VSCOcam with b5 preset

Overall I was very happy with my results. The only con that I can identify is that the softness was not the same as when I did the banana condition. It was definitely nothing to complain about but the banana seemed to give a lasting softness. That said, I love love love it 🙂


ps. I define a kitchen natural as someone who can operate their entire hair regimen out of their kitchen. Nothing wrong with it, I just never thought I’d be one 🙂

‘Fro Tales: Bits and pieces left behind

Edible conditioning

Kimono--Begin

Hey guys!

so as promised I have another fro tales story for you! This is actually based on a very recent experience so I thought I’d share while emotions are still high.

I’ve never really been one to go grocery shopping for my hair if you know what I mean. So all the hair tutorials that suggest that you should only use edible products on your hair have never really appealed to me. However, my hair has been feeling a little dry and brittle lately and my regular conditioner just wasn’t cutting it so I decided to ramp it up with a banana deep conditioner.

As they say hind sight is 20-20 so there are several things I ought to have done differently but here’s what I did anyway…I got myself one banana, a few oils and some shea butter. I mashed up the banana with a fork (I don’t have a blender), added my oils and shea butter and whisked with my mixer. I figured that the mixer would make it smoother; which it did. I still expected the one or two lumps that remained but I wasn’t too worried. So I applied the mixture to my hair and left it in for about 30 minutes as instructed.

Everything was fine up until this point. I hopped in the shower to rinse it out, but it wasn’t all coming out so easily. I figured some of those lumps I mentioned earlier had gotten caught in my curls so I washed and rinsed again. Still feeling a few lumps, I decided to give it one final scrub with some conditioner and rinsed out. By this time I was certain I had gotten most if not all of it out. so I walked out of the shower. To my absolute horror my entire head was still very speckled with banana bits.

I remained in denial until I got into my room and tried to comb it out. Alas since I had washed my hair with hot water, the banana bits had cooked on my strands so just combing through wasn’t going to cut it. Two days of brushing through my hair and I finally managed to get most of it out. I currently still have a few pieces here and there that I find when I’m going through my hair.

The highlight of all of this is that my hair really did feel very soft and moisturized afterwards so I will definitely try this again, BUT there are some things I will do differently.

1. rinse with cold water

2. strain the crushed banana to get rid of the bigger lumps

3. find a way to blend the mixture to an even smoother consistency.

I hope this is a more successful experience on my next try 🙂 wish me luck!


picture by: Willyverse

3 step hair routine

  I’ve missed blogging so much!

Hey Guys!

I know I haven’t been on here for a while, but lets just go ahead and blame school for that. That being said, I’m happy to be done with midterms for a little while and to be able to blog and sew and just live again. The second reason I haven’t been here though is because I haven’t really known what to blog about, but that’s okay I guess. Anyhu I’m here now and I figured I’d talk about my hair routine.

So I have condensed this process over the years and I’m hoping to condense it further so if you have any suggestions please comment below 🙂

1. Pre-poo

Okay I won’t even lie I don’t do this all the time, but if I feel like my hair needs a little more tlc I will saturate it with conditioner and detangle about 30 minutes before I head into the shower. Detangling before I shower makes my in shower routine go by a lot faster. My current conditioner is the Herbal Essences Hello Hydration. It does the job, but I still feel like I might need a deep conditioner. I section my hair off into manageable twists

Processed with VSCOcam with a5 preset
The only four products I use

2. Shower.

On the days that I shampoo my hair, I rinse out the conditioner, go in with my Shea Moisture (shea butter) shampoo and scrub. I only go in once with the shampoo unless I really need it. Other times, I simply co-wash my hair. I take the twists down and further detangle with the help of the water pressure. I generally recondition my hair  for a few minutes, then rinse with cold water. I don’t know how true this is but cold water is supposed to help you lock in the goodness from your conditioner. I also make sure to rinse my hair by tugging and smoothing down sections under the water. This keeps it detangled and helps my curls clump better

Processed with VSCOcam with b5 preset

3. Post-wash

I can no longer be bothered to style my hair from its soaking wet state because it simply takes to long. Now I coat my hair with the Auntie Jackie’s curling custard and a Shea butter+coconut oil mix and braid my hair into two large cornrows. I find that its easier to style my already stretched hair or to at least work with damp hair because it more likely to dry. 3 step hair routine

As far as products go I generally do what works best or what I can afford 🙂 (student life). I really liked the shea moisture deep conditioner but I ran out and haven’t repurchased because its pretty scarce in Canada and also rather pricy. I also really like the smell of the Aunt Jackie’s curling custard. This is really awesome to me because some natural hair products smell too “earthy”.


Hope this was helpful/interesting for my sistas…peace out!

ps. I have a new “fro-tales” story coming soon so look out 🙂

‘fro Tales: As seen on youtube

Processed with VSCOcam with c1 preset

2 and a half years natural and all I can say is…natural hair is not easy! Forget what you heard.

I think when people big chop and they are dealing with about an inch of kink they assume that natural hair is easier to manage but alas that is but a phase in the never ending hair journey and it gets more difficult as time goes on. Now this is not to discourage anybody who is thinking of going natural because as annoying as my hair is sometimes I wouldn’t have it any other way. I’ve had way more fun with my curls than I ever did with straight hair. Anyhow, in the course of my natural journey, I have had many mishaps that are fairly amusing to look back on. Today, I shall tell the tale of my very first flexi rod set 🙂

I would start by saying I never big-chopped so at some point in my super long transition, I had to get creative with blending my two textures. Bantu knot outs had always worked for me but I was craving a change. Of course as most naturals would do, I skipped off to youtube for guidance and after many videos I was certain that flexi rods were the bees-knees!

I painstakingly prepped my hair the night before, spritzing with water, coating with shea butter and rolling like my youtubers were doing. Two hours and incredibly sore arms later I found my way to bed. Now all this suffering might have been better if I at least had a good night’s sleep. Alas, what they forgot to mention in all the videos I had watched was that those flexi-rods will stick painfully into my scalp and they would make me toss and turn all night. I just remember lying in bed trying to convince myself that beauty is pain and it would all be worthwhile when I have lush, bouncy curls in the morning.

I got out of bed (Can’t say I woke up because I never really slept) and took my precious time getting ready because I wanted to give my hair as much time a possible to set. Finally the moment of truth came. As I unrolled my first rod, it took everything in me not to cry. The one thing I have learned to fear the most about styling my natural hair happened…it did not dry. I stared at that section as it was slowly shrinking, willing it to magically transform into what I had seen on youtube. I slowly unraveled the rest of my hair and sat miserably staring at my reflection and trying to convince myself that it wasn’t as bad as I thought it was. Some pieces had dried more than others so my hair was unevenly stretched not to mention the odd straight pieces that just didn’t know what to do with themselves. In hindsight, I should just have pulled it into a bun and wrapped it but I was still clinging to what could have been.

I stuck a flower in it and carried my hot mess out, albeit a little self-conscious. I managed to convince myself that it wasn’t so bad and a few of my friends (bless them) boosted my confidence with very careful compliments…”I love how you put the flower in, it really brings out your features”. Alas my delusion could only last so long, I was forced to come to terms with my hot mess when one of my friends thought it fitting to ask why I hadn’t done anything to my hair that day. I stared at him not really knowing what to say. If only he knew just how much I had actually done.

Moral of the story? I don’t know, It was just a really bad hair day :p

Something Borrowed…

Begin styling a midi skirt

This post is a classic case of “borrow borrow make me shine” (I don’t know if that really requires translation).

Being in Nigeria, with full access to my mum’s closet is absolute perfection! She has acculumated so many charming pieces and valuable resources over the years so naturally as her daughter, I think its my responsibility to give her possessions a whirl no? Well whether or not you agree with me, I did just that. My mom found this gorgeous fabric that she’s had since she graduated university and she hasn’t used it since, so I decided to help her by taking it off her hands :D. Surprise surprise…she also had a sewing machine (how amazing is this?? and how have I never known this?!). The minute I saw that fabric the first thing I thought was “Midi Skirt”and right after that I thought “I can’t afford to screw this up”. Now this wouldn’t be the first midi skirt I’ve made so maybe I was feeling a pinch too confident about my abilities but this skirt was w.o.r.k! The last midi skirt I made was an upcycle so I didn’t anticipate the challenges I might have making this from scratch. Basically, I had no clue what I was getting myself into.

Begin Midi back view

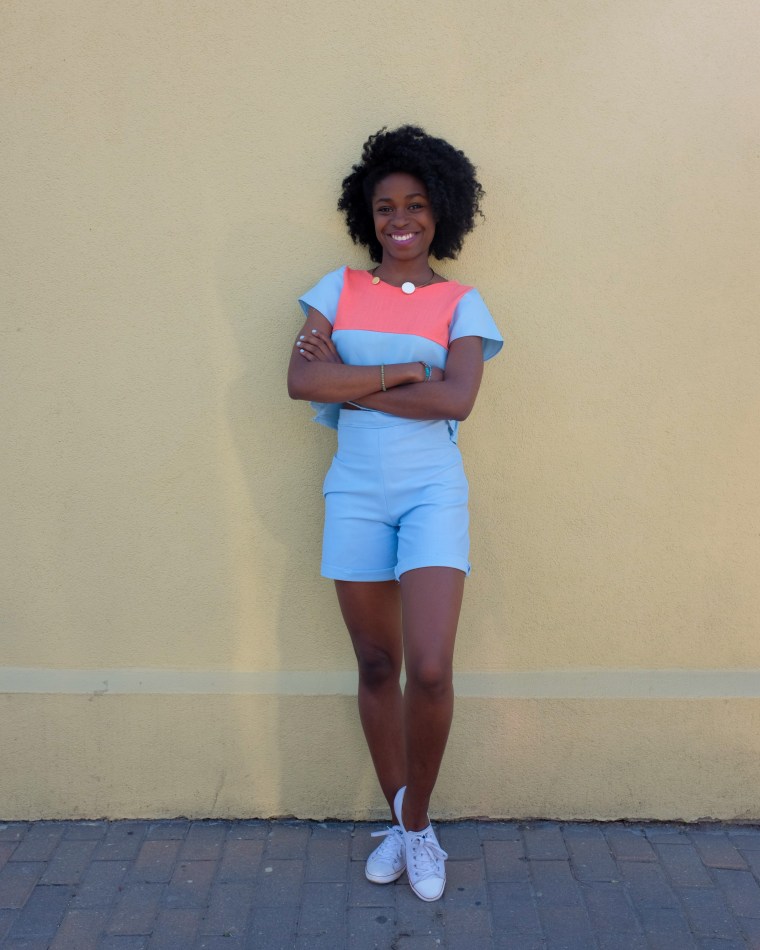
I started by measuring my waist and how long I wanted it to be. From that point on I felt like I was on an island with no map and only a picture of my destination. I knew what I wanted to get but I had no idea how to achieve it. In hindsight, planning might have helped me here. If I had done a teeny bit of research before starting I would have know to cut  the fabric to 3 times my waist size so when I added my pleats, I could achieve the fullness I wanted. I started off with something that looked like a pencil skirt gone wrong. Then I tried to make it more a-line but I only wrecked it more. It was only after research and lots of redone stitches that I managed to get it looking like this.

Begin Midi Skirt

For difficulty, I would rate it a 5/10, it was not my easiest project but it would have been a lot easier if I had started properly. Oh and while we’re on the topic of difficulty, I think I’m starting to really get the hang of zippers! It took me a few attempts but I managed to keep my invisible zipper relatively invisible 😀

Begin invisible zip

When I remake this skirt (note I did not say “if”), I will look into the slip stitch more seriously, I tried looking at a Pintrest picture tutorial when I was making this skirt. When that failed miserably, I decided to follow my heart and I managed to hem it somehow, not sure what that stitch is called but it did the job 😛 (the too-lazy-to-follow-the-pintrest-one stitch?)

With the many up’s and down I faced making this skirt I was reminded that this is what I signed up for when I decided to teach myself to sew. I signed up for trial and error, for hours spent redoing one seemingly simple thing, and of course for the absolute pride I feel when I’m done. It’s frustrating sometimes but its always worth it.

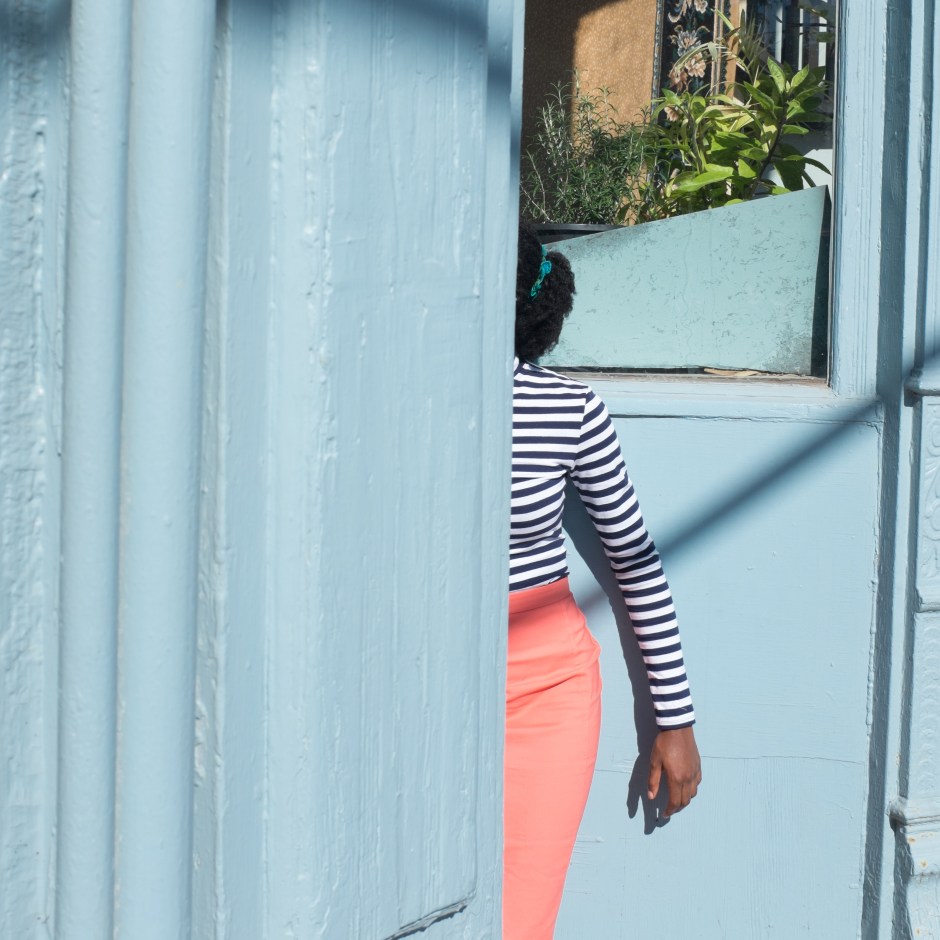
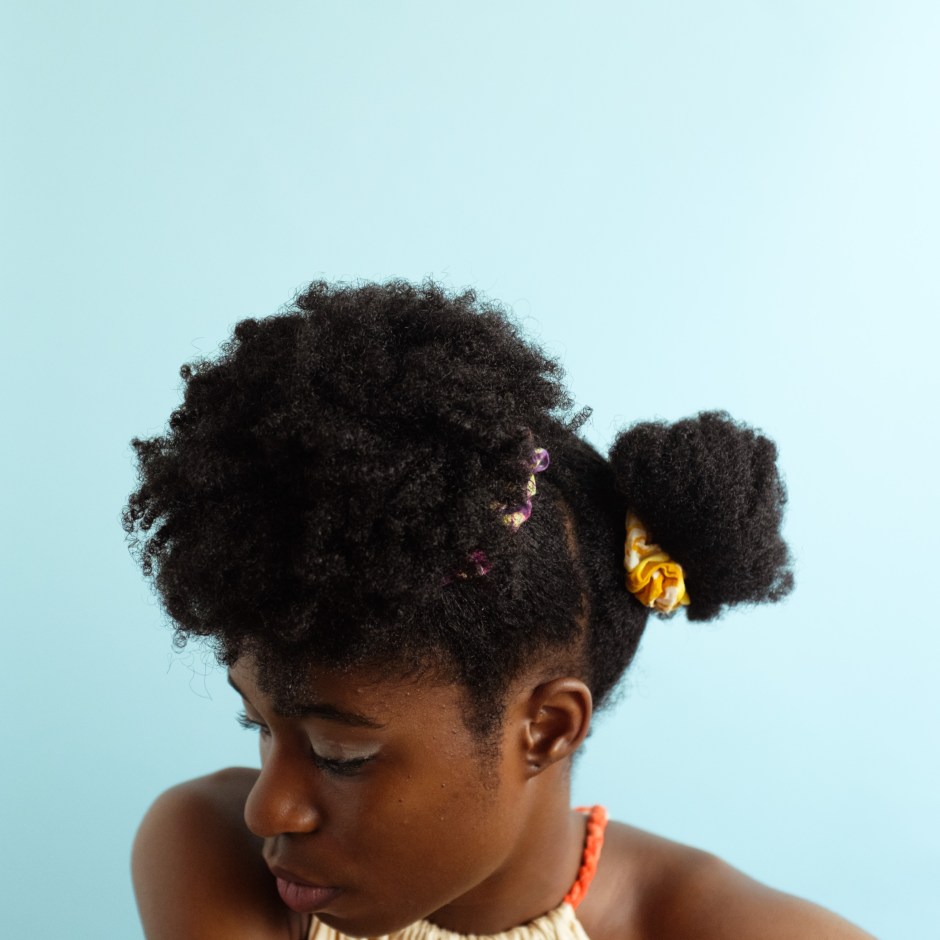
I decided to maintain the theme of “out of mama’s closet” and took her old sunglasses (which I intend to own), her scarf, and her book to accessorize this look. The humidity also lent me a ton of volume so as I said in the beginning…borrow borrow make me shine 🙂  Begin something borrowed

pictures by Willyverse